Shuffll Workflow Overview
Shuffll enables seamless AI-powered video creation, allowing businesses and developers to generate, enhance, and export videos automatically.
Integration Options
You can integrate Shuffll in two ways:
1️⃣ Shuffll API – For full programmatic control over the video creation process.
2️⃣ Shuffll iFrame – Embed Shuffll’s project creation wizard directly into your application.
API Approaches
For API users, there are two different approaches depending on how much control you need:
🔹 1. Full Sequence: Step-by-Step Control
Use separate API calls for each stage:
- Create Project → Monitor Status → Enhance → Export → Retrieve URL
- Ideal for applications requiring custom processing, additional editing, or detailed progress tracking.
🔹 2. AutoEnhance + AutoExport with Webhooks: Full Automation
Use a single API call to create a project and let Shuffll handle everything else automatically.
- AutoEnhance applies branding, effects, subtitles, and post-production automatically.
- AutoExport finalizes and delivers a ready-to-publish video.
- Webhooks notify you when each stage is completed—no need for polling.
- Ideal for high-volume automation and reducing API calls.
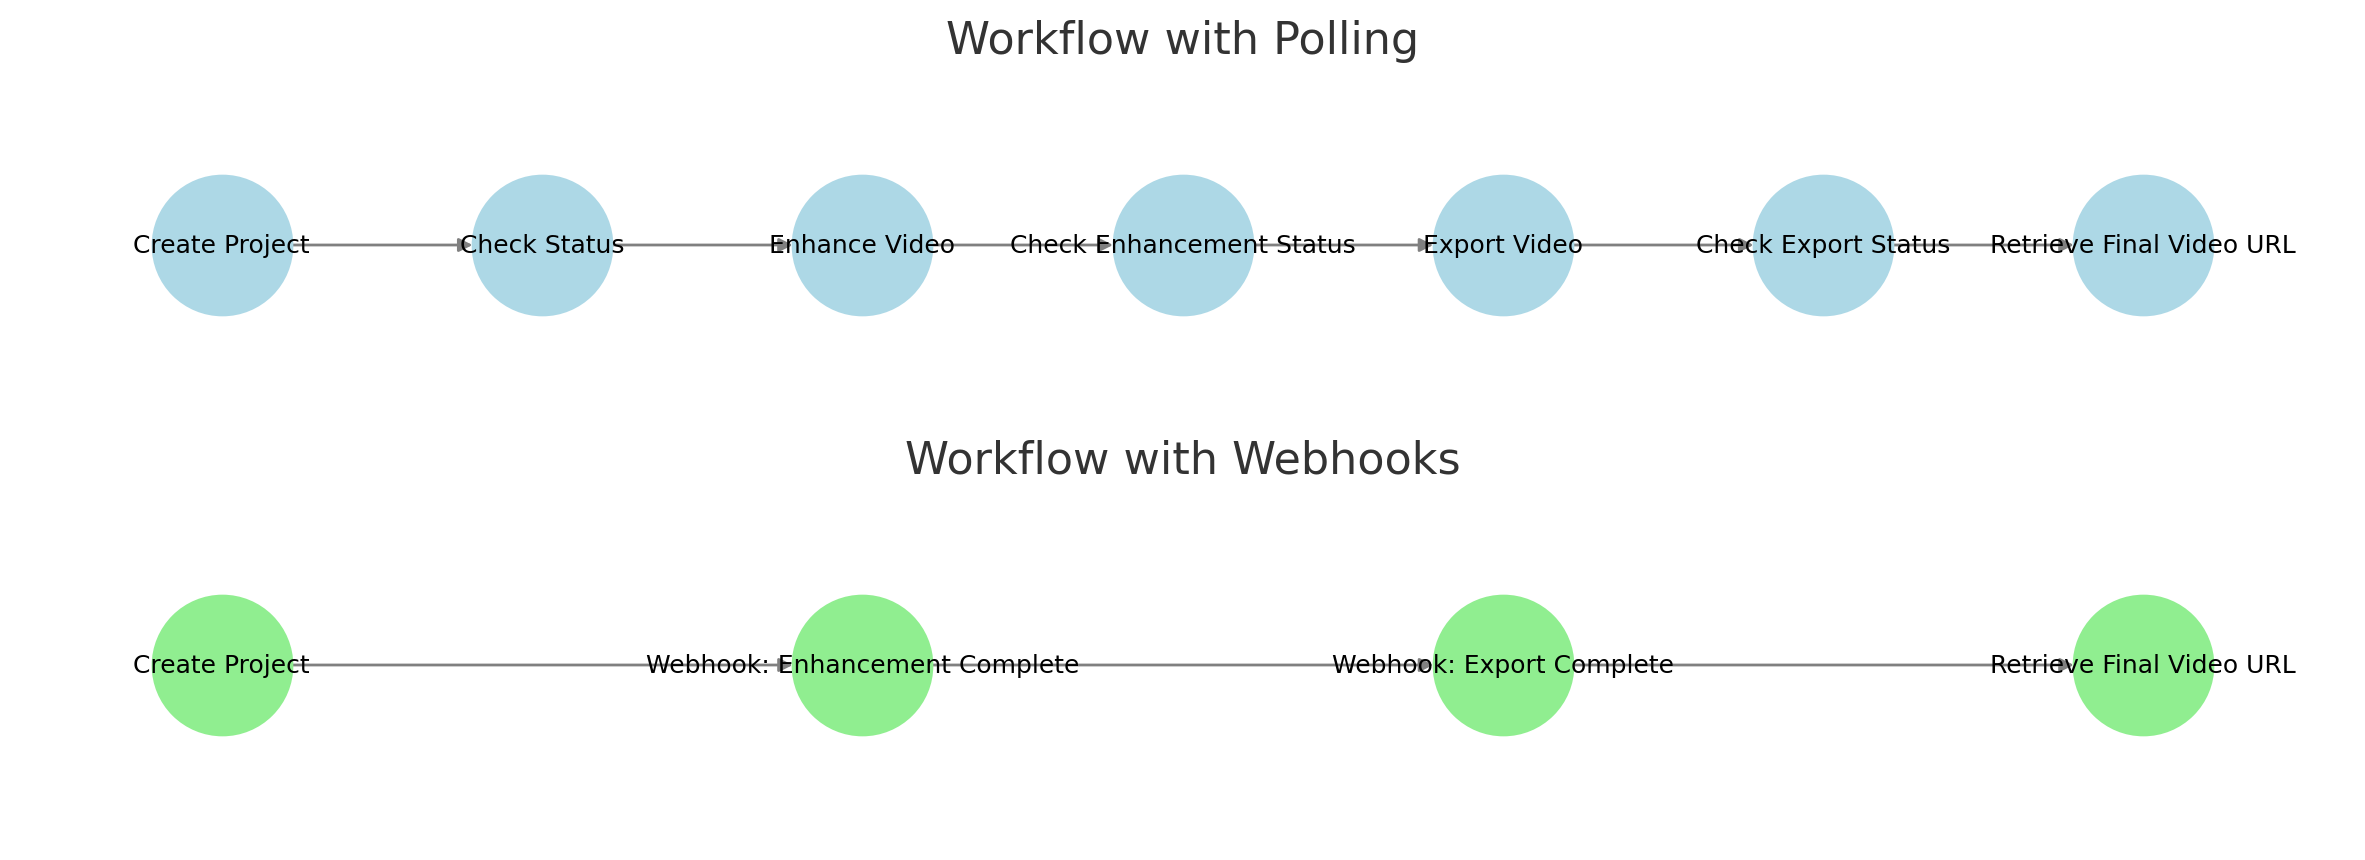
Polling vs Webhook Flowchart
Shuffll provides two ways to automate video creation:
1️⃣ Polling-Based Workflow – Requires multiple API calls to check status at each stage.
2️⃣ Webhook-Based Workflow – Uses event-driven automation to reduce API calls and fully automate the process.\

🛠️ Polling Workflow
- Create Project → Call
POST /project/create - Check Status → Poll
GET /project/{projectId}/status - Enhance Video → Call
POST /project/{projectId}/enhance - Check Enhancement Status → Poll
GET /project/{projectId}/enhance/status - Export Video → Call
POST /project/{projectId}/export - Check Export Status → Poll
GET /project/{projectId}/export/status - Retrieve Final Video URL
🔹 More API calls but granular control over each phase.
Webhook-Based Workflow (AutoEnhance + AutoExport)
- Create Project → Call
POST /project/create - Webhook Notifies Enhancement is Complete
- Webhook Notifies Export is Complete
- Retrieve Final Video URL
🔹 Fewer API calls and fully automated with webhooks.
When to Use Polling vs. Webhooks?
| Feature | Polling Workflow | Webhook Workflow |
|---|---|---|
| Granular Control | ✅ Yes | ❌ No |
| Minimizes API Calls | ❌ No | ✅ Yes |
| Real-Time Status Checking | ✅ Yes | ❌ No |
| Ideal for Large-Scale Automation | ❌ No | ✅ Yes |
| Requires Webhook Support | ❌ No | ✅ Yes |
Choose Polling if you need full control, custom logic, or manual intervention.
Choose Webhooks if you want hands-free, fully automated video creation.
The Full Video Creation Process
Shuffll follows a structured workflow with the following steps:
1️⃣ Project Creation – Define the idea, create a script, and structure a storyline.
2️⃣ Video Generation – Turn the storyline into a full video using AI-driven media creation.
3️⃣ Enhancement & Post-Production – Add branding, animations, subtitles, and optimize audio.
4️⃣ Export & Publishing – Finalize and distribute the polished video.
iFrame vs. API: Which One to Choose?
| Feature | API Integration | iFrame Integration |
|---|---|---|
| Customization | Full control over every step | Pre-built, ready-to-use UI |
| Ease of Use | Requires API development | No-code, easy embedding |
| Automation | Can be manual or automated | Fully guided video creation |
| Best For | Developers & advanced automation | Platforms wanting to offer video creation as a service |
Webhook Handling Example
Example: Handling a Webhook Notification (Node.js)
const express = require("express");
const app = express();
app.use(express.json());

app.post("/webhook", (req, res) => {
    const { event, projectId, videoUrl } = req.body;

    if (event === "video_ready") {
        console.log(`Video is ready: ${videoUrl}`);
    }

    res.status(200).send("Webhook received");
});

app.listen(3000, () => console.log("Webhook server running on port 3000"));
This example listens for webhooks and logs when a video is ready.
Full API Workflow Example (AutoEnhance + AutoExport)
Example: Creating a Video with Webhooks, AutoEnhance and AutoExport (Node.js)
# Step 1: Create a Project with AutoEnhance & AutoExport
curl -X POST "https://api.shuffll.com/api/v1/project/create" \
  -H "Authorization: Bearer YOUR_API_KEY" \
  -H "Content-Type: application/json" \
  -d '{
    "prompt": "How AI is revolutionizing marketing",
    "templateId": "123456",
    "videoTagId": "Marketing",
    "autoEnhance": true,
    "autoExport": true,
    "webhookUrl": "https://yourserver.com/webhook"
  }'

# Step 2: Wait for Webhook Notifications (Your server automatically receives updates)
# Step 3: Retrieve Final Video URL from Webhook Response
This example creates a project with AutoEnhance and AutoExport, and then waits for webhooks to notify you when the video is ready.
Troubleshooting
Webhook Not Triggering? 🔹 Ensure the webhook URL is publicly accessible. 🔹 Check firewall rules that might block incoming requests.
Polling Causing Rate Limits? 🔹 Implement exponential backoff (wait longer between requests). 🔹 Consider switching to webhooks for automation.
iFrame Not Loading? 🔹 Ensure your embedding domain is whitelisted.
Next Steps
API Integration – Learn how to implement the API step by step. iFrame Integration – Learn how to embed Shuffll’s project creation wizard in your app. Webhook Guide – Set up automation without polling.
Ready to start? Let’s create your first video!
Final Enhancements
✔ Single-file format for easy access.
✔ Polling vs. Webhooks Flowchart included.
✔ iFrame vs. API Table for clear decision-making.
✔ Webhook Example (Node.js) for event-driven automation.
✔ Full API Workflow Example (cURL) for automation.
✔ Troubleshooting Section to solve common issues.